
Autodesk 3ds Max is a professional 3D computer graphics program used for making models, animations, games, and images. The software was released in the year 1996 by Autodesk. 3DS Max is compatible with Windows operating system. here we will learn how to Install 3ds Max.
The software is commonly used by video game developers, architects, TV commercial studios and visualization studios. Some of the major features of 3DS Max are dynamic simulation, particle systems, radiosity, normal map creation and rendering, changeable user interface and it supports its own scripting language.
Due to the high price of the commercial version of the program, Autodesk also offers a free student version, which strictly mentions that it should be only used for educational purposes.
The student version has almost the same features to the full version, but it is only for single use and cannot be installed on a network. This student license expires after three years of purchase.
A network rendering management software is also associated with 3Ds Max called Autodesk Backburner. This software helps the user to manage rendering tasks according to the users need and requirements. This program can also install without installing 3Ds Max. But, this will be of no use and the user must ultimately install the main program associated with it. However, the user can monitor and control tasks using the Back Burner.
Material Libraries
One more important product that comes default with the installation of 3Ds Max is the Material Libraries. These Libraries are the storehouse of some features and effects that are pre-installed with the program. These libraries are also installed with other Autodesk products such as AutoCAD, Autodesk Revit, and Autodesk Inventor.
The Autodesk Material library is further divides into three sub-categories:
- Autodesk Material Library 2019
- Autodesk Material Library 2019 – Base Image Library
- Autodesk Material Library 2019 – Medium Image Library
Installing 3DS Max
All the Autodesk products can be obtained in the following ways:
- Autodesk Store
- Autodesk Account
- Education community
- Trial Versions
- Boxed Media
- Product Purchase Option
- Autodesk Desktop App
To download the products
- First, the user needs to choose a download method. This can be either Install Now, Download Now or Browser Download. If in case a method is not listed, then it may not be available for the respective Operating System or Browser.
- Install Now Method is the default method for installation. It is the fastest method because it lets the user select only the specific products without waiting for all files to download. The user can use this option for a single computer or for a trial version.
- The Download Now method is for administrators creating a network deployment.
- The Browser Now methods let the user download the complete package from a browser. It is a much slower method.
- Next, the user can choose the product details such as language, version, and operating system.
- If the user chooses Download Now, then first download and install the Autodesk Download Manager and then use the DLM to download the product.
- Read and accept the license agreement and click Install.
- It is recommended that the user should accept the default download location.
3DS Max Minimum System Requirements
- Windows 7, Windows 8 or 8.1 or Windows 10
- 4GB RAM
- 64 Bit CPU
- Graphics card
- 6GB Space
Steps to install 3DS Max
- Open the official website of Autodesk
- Then type Educational Licensing in the footer search
- Open it and then find 3D Max
- Create a new account and login with that account
- Fill the required details in the form.
- An email will be sent to the registered email if for the license.
- Now the user can install Autodesk 3D Max Installer.
Depending on where you are installing from, do one of the following:
1. Click Install Now
2. An EXE or DMG file will be included with the installer. The name of the file will be such as setup.exe. Otherwise, the user can launch the respective files from the delivered content.
3. Next, choose the option Install.
4. There will be a drop-down menu for the preferred language. The user can choose the desired language.
5. The user then needs to set default preferences for the installation location or can select as per their wish.
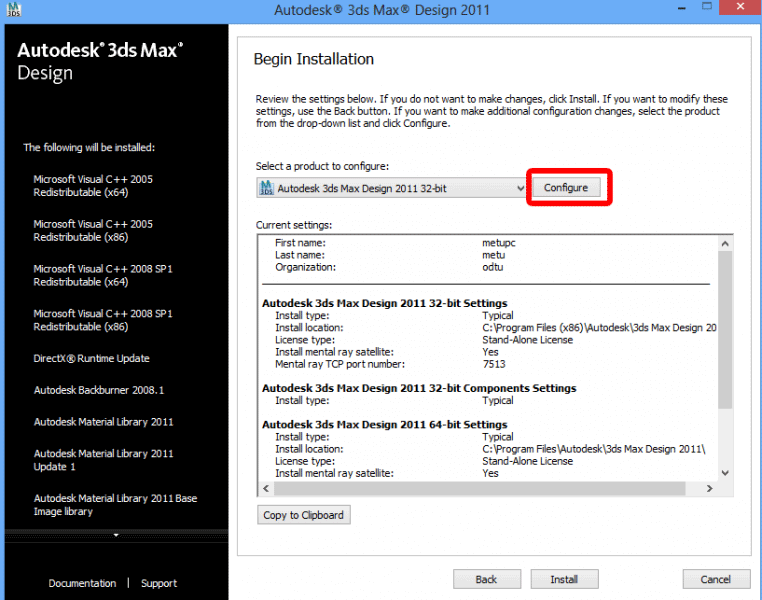
6. Configure your installation:
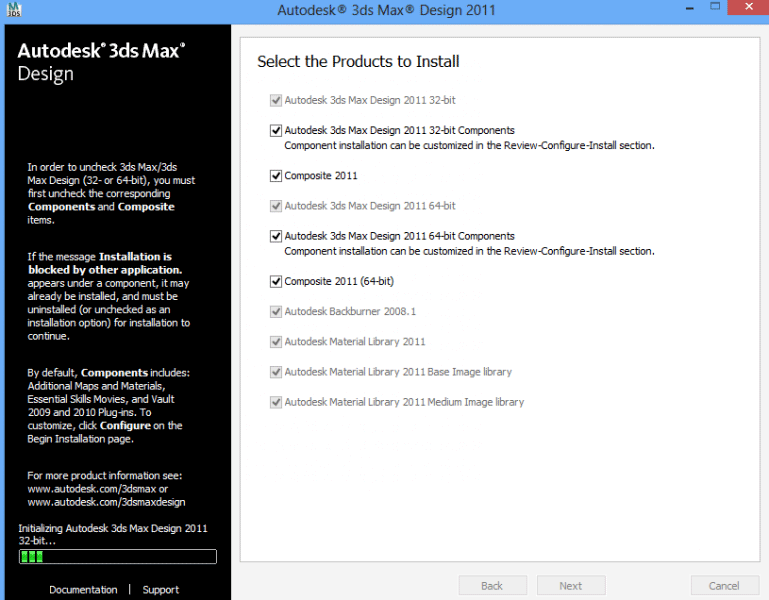
- The user either needs to accept the default settings by choosing Install.
- Or the user can modify the products to be installed as per their wish by selecting and deselecting products and other settings.
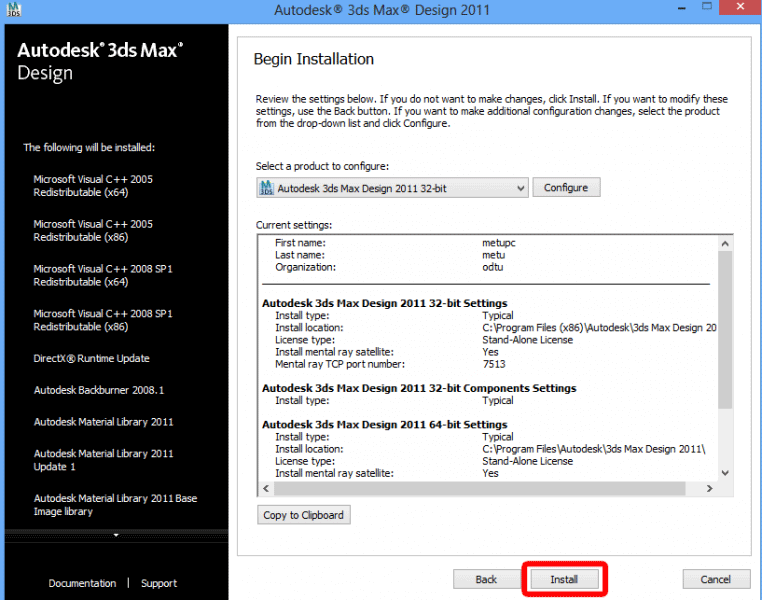
- When the user has finished doing the configurations he must choose the Install option.
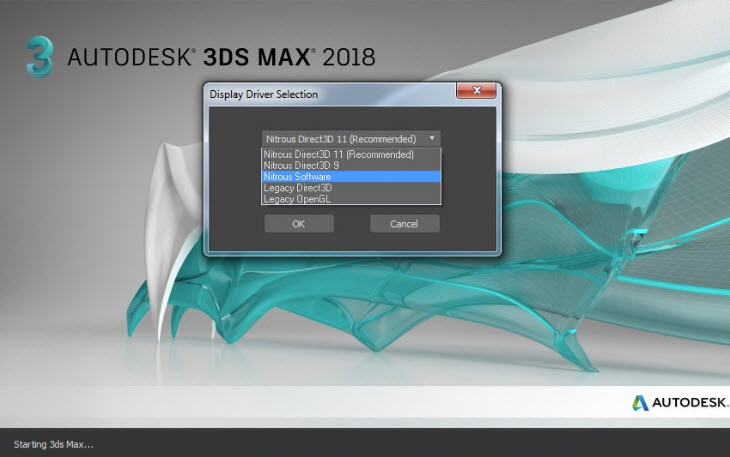
7. Finally, have a quick look for the installed products and choose Finish to start the program.
If the user wants to install the product on Networks using License and Serial Number.
1. You should choose Install Products on the screen.
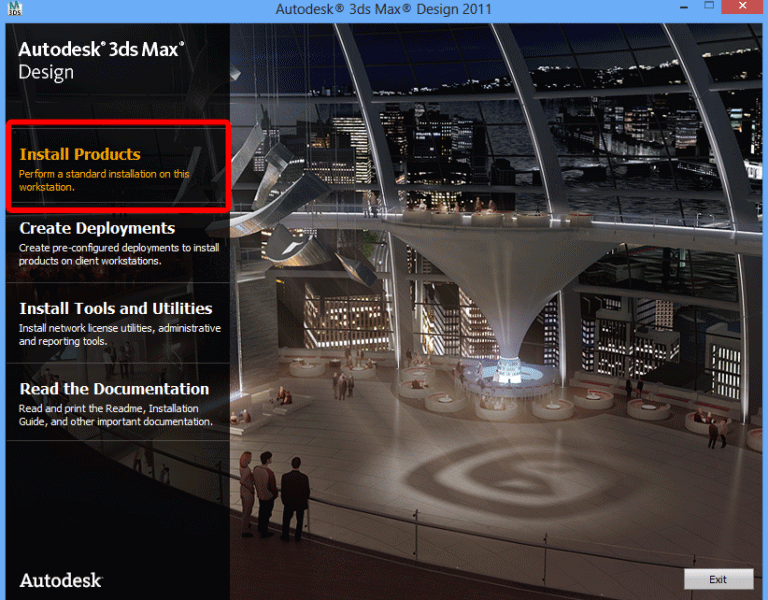
2. Components Installing will take some time.
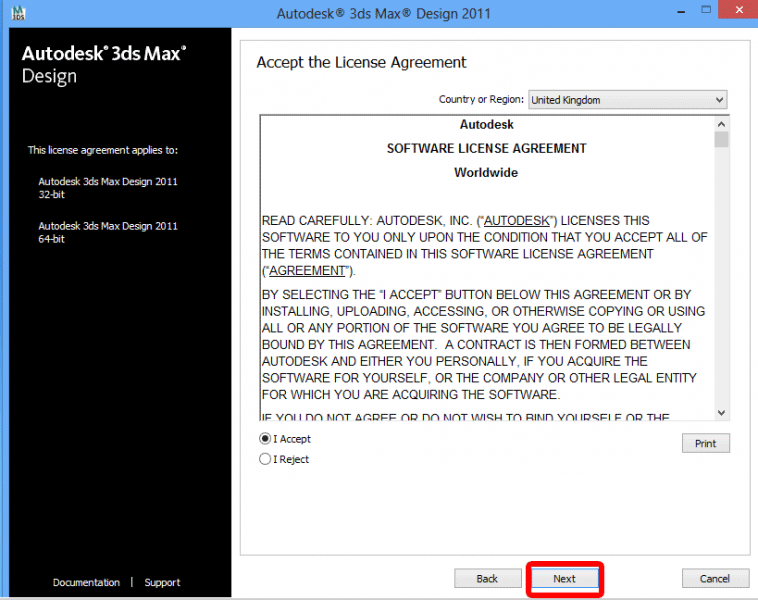
3. Accept the license agreement to install. Click on Next button
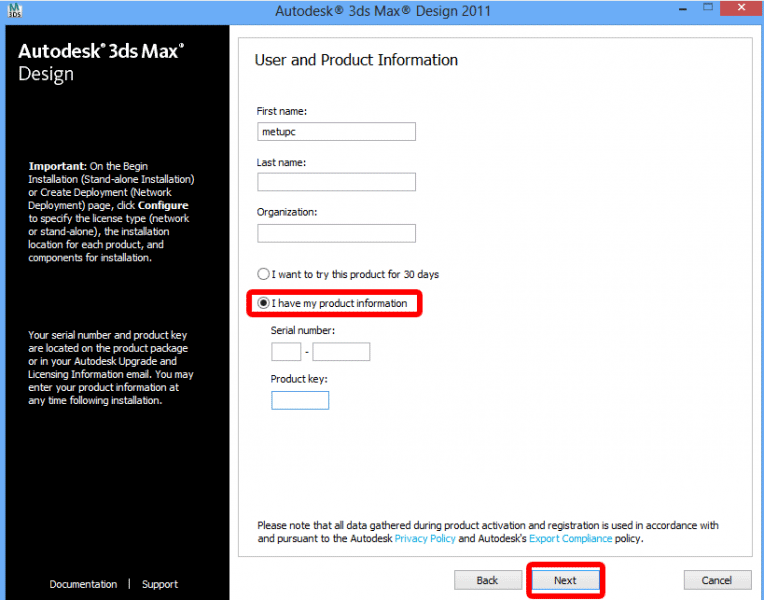
4. Select I Have My Product Information option. Enter the Serial number with the help of the txt file. Click on the Next button.
5. Click on Configure on screen
6. Choose the Network license option.
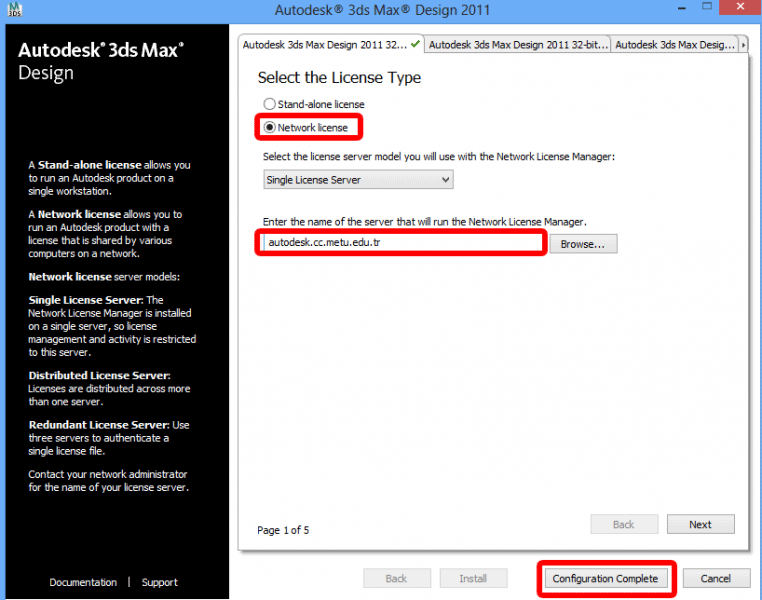
7. Click on the Install button. And the product is installed.
8. Finally, 3Ds Max will be installed.
Source: educba.com