
My Face Mask is a Blender Addon that allows you to design your own customized face mask.
The free add-on was designed by Alessandro Zomparelli – the Italian developer of the Tissue add-on that comes with Blender. Amongst a number of presets for several parts of the face mask, you can choose one and adjust multiple parameters like thickness of parts, perform manual fine-tuning, and ultimately export the result as a 3D model that’s ready for 3D printing. While we are living in a serious situation of corona disease, there are probably increasing needs of face masks. Hence, this is a good solution for it.
To start, you’ll need a (rough) scan of the face for which the mask will be generated. This can be realized using any modern smartphone. Check the links at the bottom of the article for dedicated Google searches to get you going, and for links to the addon download page and instructions.
Below you can find a quick My Face Mask walkthrough. Please note that the screenshots show the development version, so some options might have changed in newer versions. Check the video after the screenshots for updated instructions.

Click the ‘Define Area’ button to start outlining the face area the mask should cover, then click on ‘Adapt Mask’
A face mask is generated
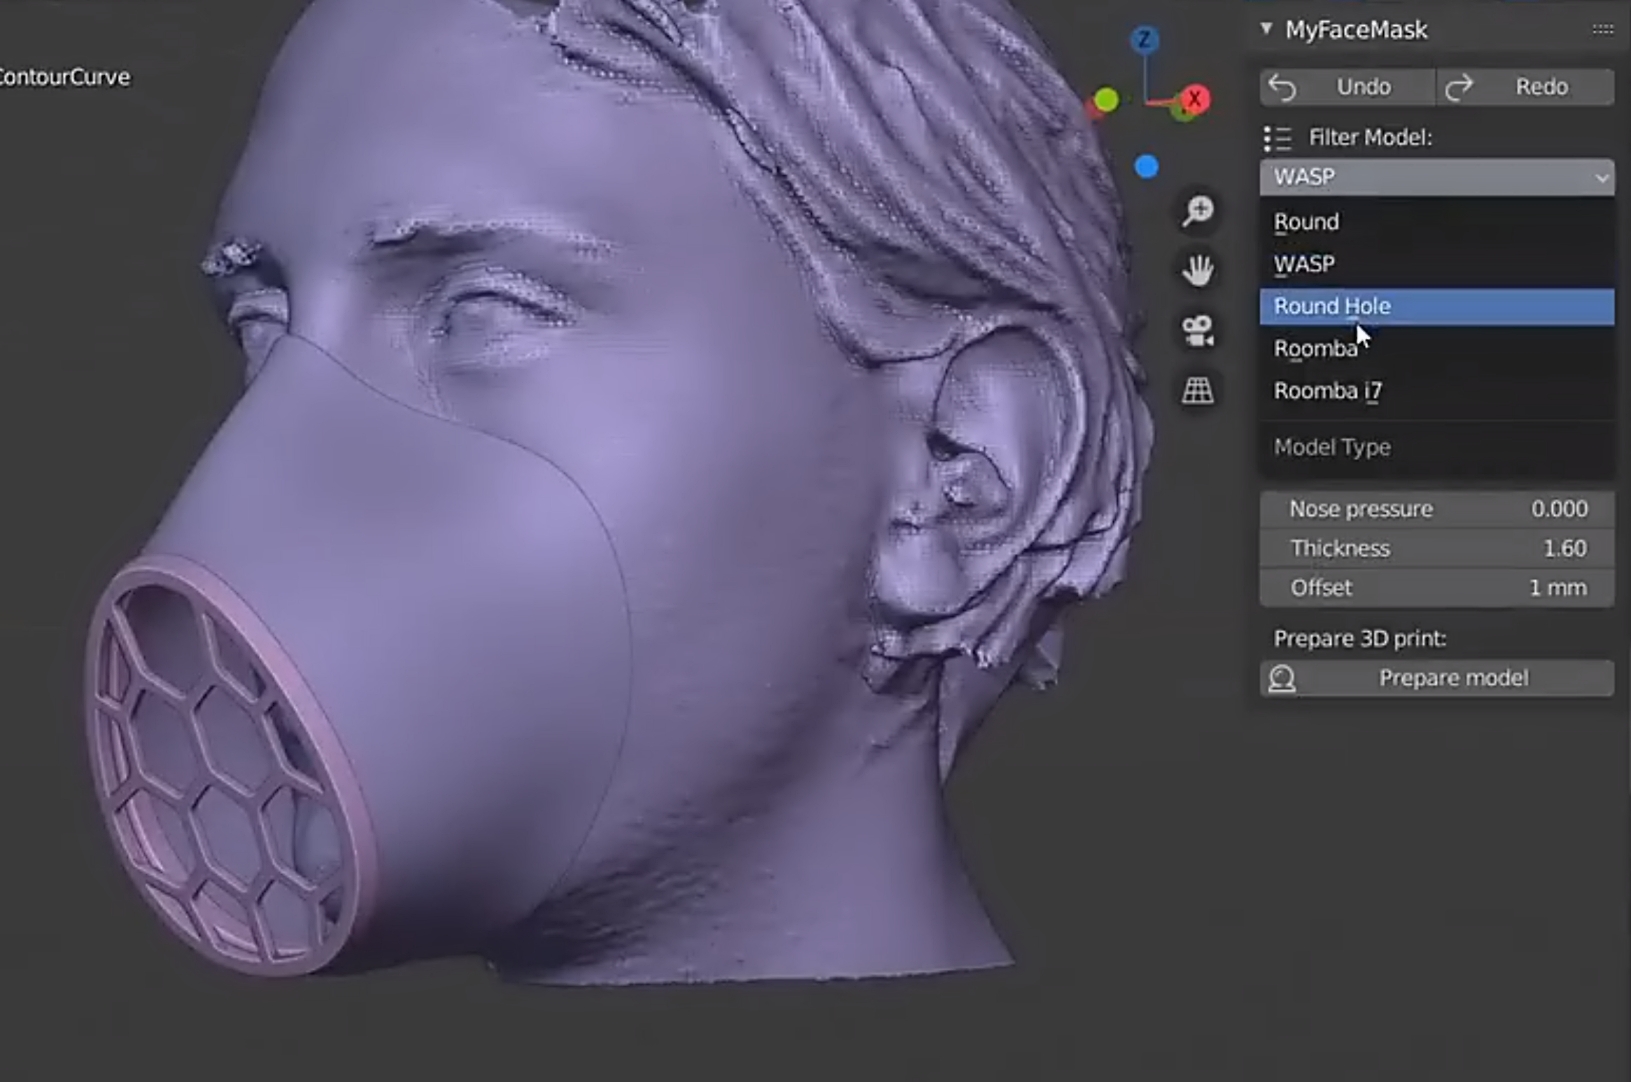
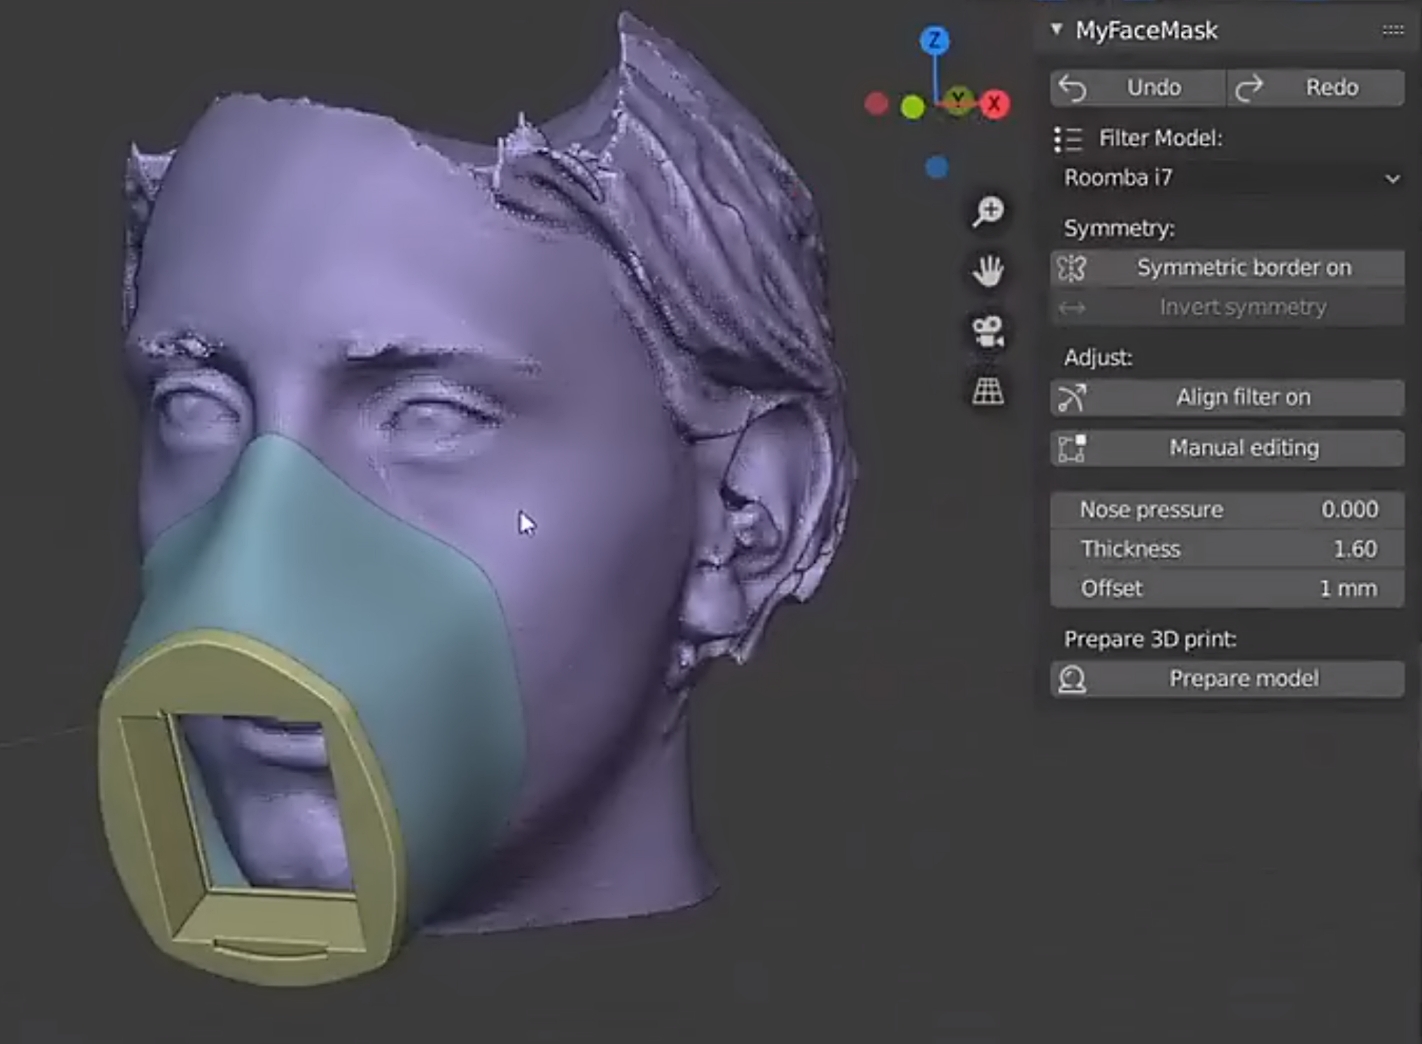
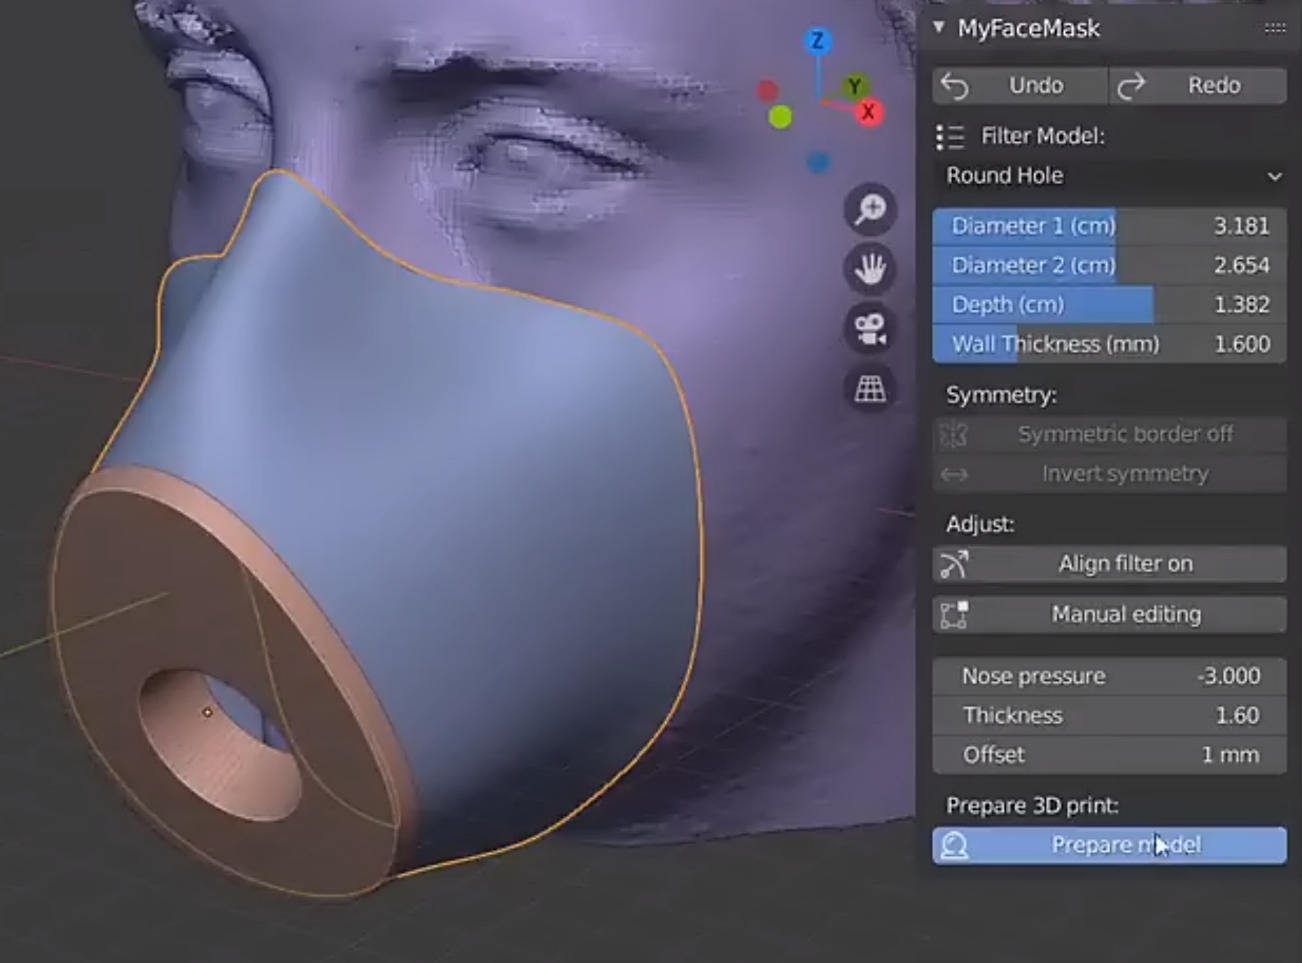
Select a face mask filter model preset, and adjust properties like wall thickness
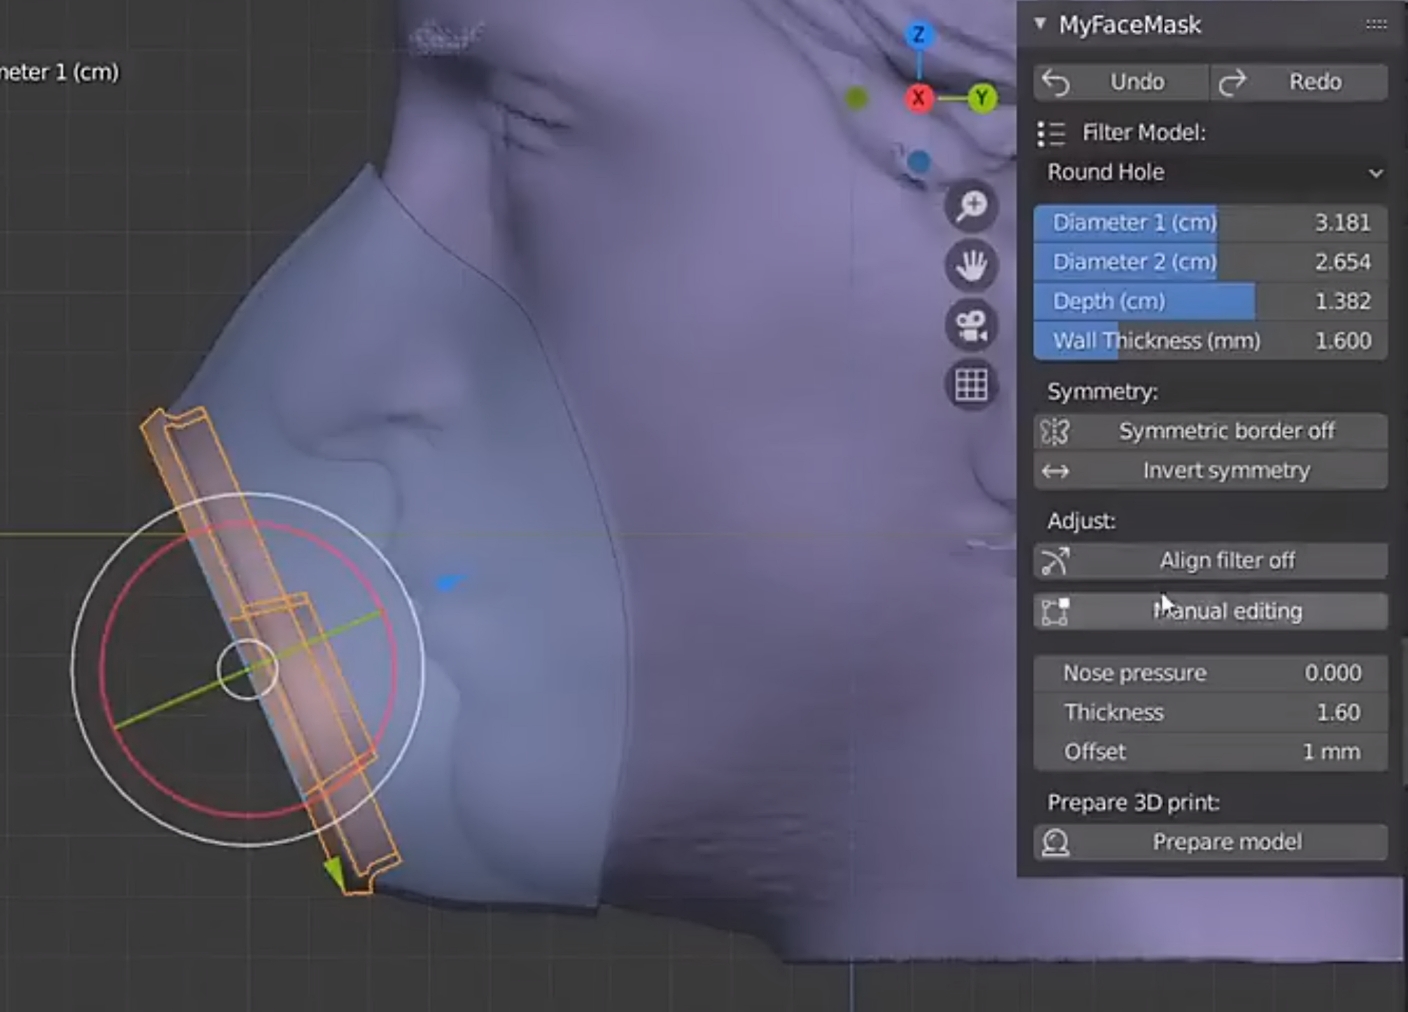
Click the Align Filter button to adjust the filter position and orientation
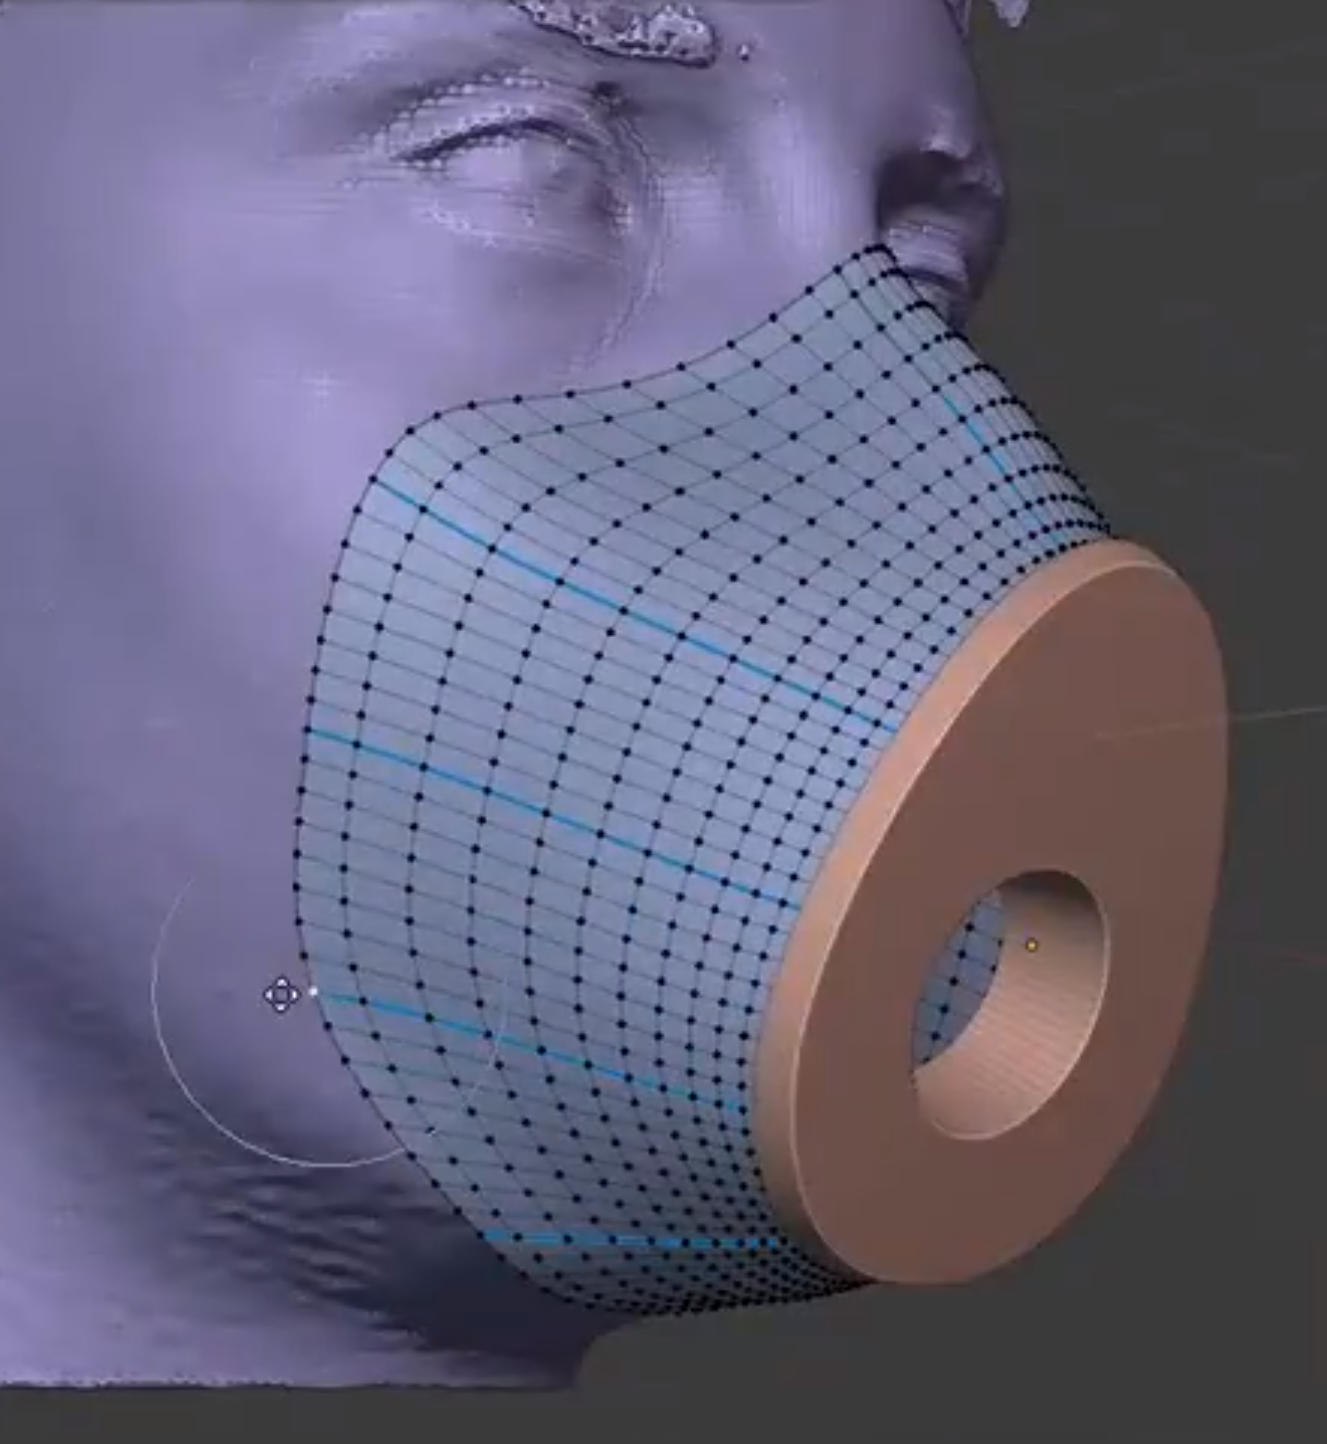
Click the Manual Editing button to fine-tune the edges of the face mask
Click Prepare Model to prepare the face mask for 3D printing

Change Hangs Types and Border Profile for the face mask model, then export the model as a print-ready STL 3D file
Once the 3D model file is exported, you’ll need (access to) a 3D printer to materialize the 3D model into an actual face mask. Below you can find a number of links to get you started.
Click on the video to watch full tutorial
Source: BlenderNation