
In this article, we will learn about UV Unwrapping in Blender. UV unwrapping refers to the process of opening a mesh for making a 2D texture that covers the 3D object. This method is effective if you need to add texture to your object precisely. You can create the texture for both Blender as well as an external image editor. UV unwrapping offers plenty of controls when compared to other mapping procedures. Additionally, it is highly compatible with game engines which is beneficial for producing gaming assets. Plus, for creating selective details, you can rely on UV unwrapping. Here, in this article, we will mention about working with unwrapping models in Blender 2.80, which is the latest version of Blender.
How to Perform UV Unwrapping in Blender?
UV unwrapping is the method of unfolding a mesh to create a 2D texture that fits in the 3D object. Let us look at a few steps for the same.
Step 1: First of all, you need to Open Blender 2.80 Application in your System.
Note: If you are using an older version of the application, you can update to the latest Blender 2.80 version freely by going to https://www.blender.org/download/releases/2-80/. This new version contains a better-designed interface that better helps while working on artworks. It also includes a dark theme and an advanced set of icons. Also, now the ‘left-click select’ is default while working with a mouse.
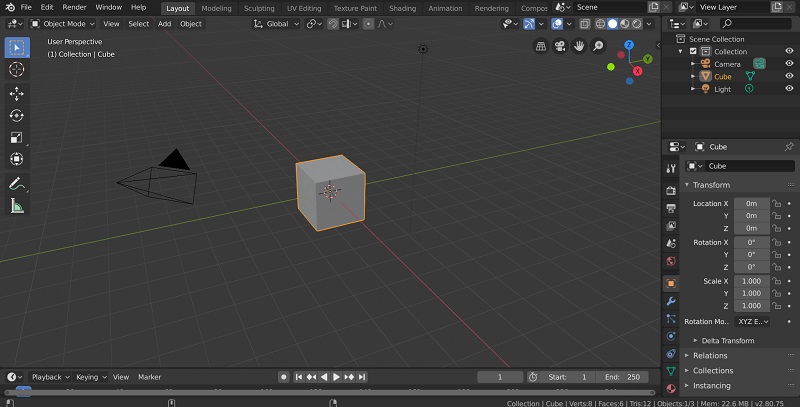
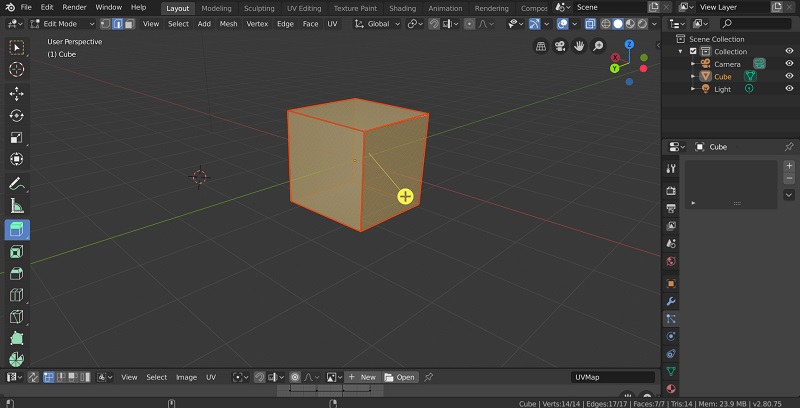
Step 2: You will notice a default Cube in the workspace. In this practice, we will attempt to unwrap this very cube.
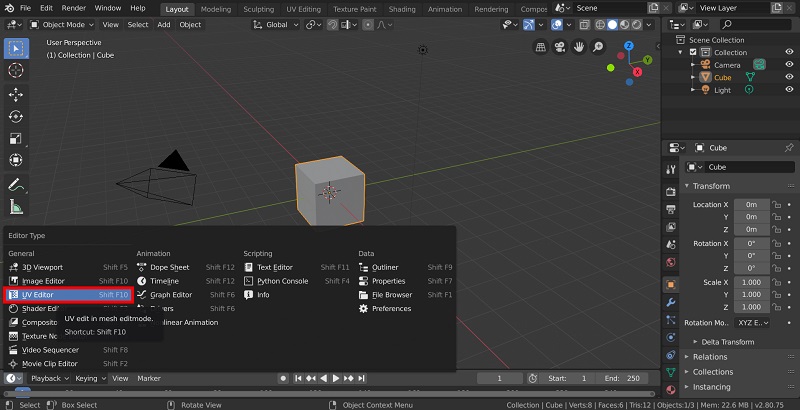
Step 3: Before that, you need to set the view to “UV/Image Editor’. Click on the icon as shown in the image below to change the view. Choose “UV/Image Editor”. That is it. The workspace is ready.
Step 4: Select the Model you have to unwrap. Here I have selected the Cube.
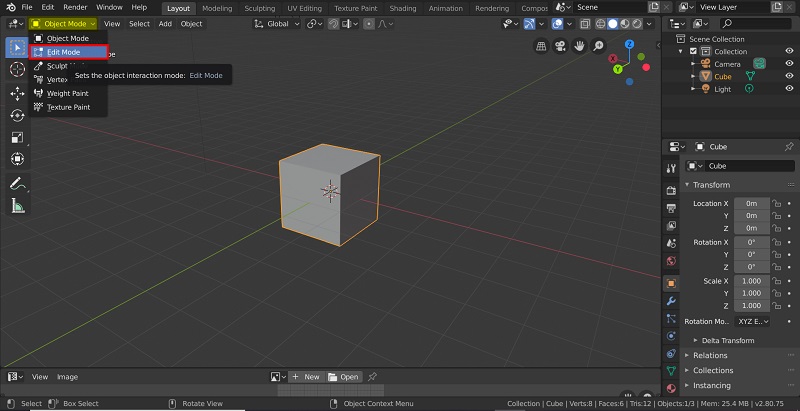
Step 5: Next, change the Mode from Object to Edit.
Step 6: After that, we have to mark seams. Seams are simply the edges, therefore, mode needs to be in edge select mode. For the easy selection of edges on the other sides, select ‘Show the Whole Scene Transparent’.
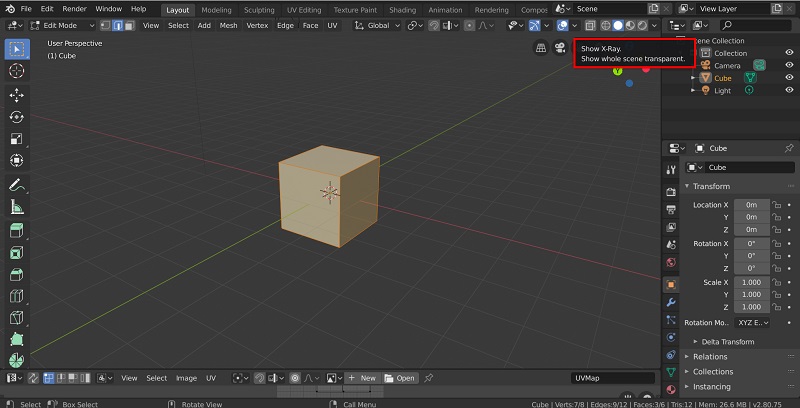
This makes all the objects in the scene to appear in semi-transparent/semi-opaque irrespective of whether they are in alteration or editing modes.
Note: For users of previous Blender versions, turn off ‘limit selection to visible’ feature as ‘Show the whole scene transparent’ is not available in older versions.
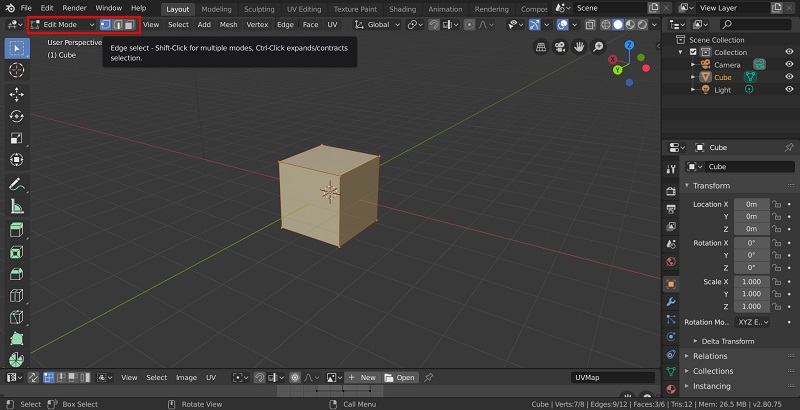
Step 7: Now, we can begin selecting edges to make them into seams. For better understanding, imagine seams as cuts made in a 3D model for converting them to 2D shapes.
Now, for selecting the edges, use the edge select icon on the top left panel as shown below.

Step 8: Next, you can mark the edges as seams. For doing that, Select Edges and click 0n Mark Seam option.
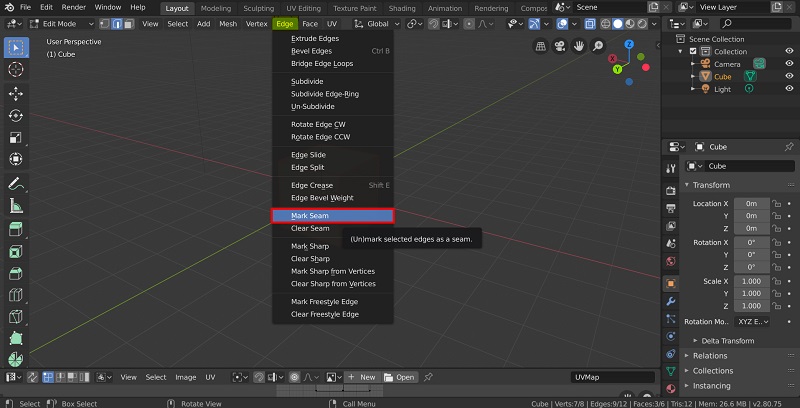
Alternatively, you can keep the mouse over the 3D view and press Ctrl+E and Mark Seam.
The seam edges will be marked in red color. However, if not, press ‘n’, with the mouse above the 3D view. Scroll down and choose the show seams option.
Step 9: We have got the seams marked. Now we will unwrap them by selecting all the faces (Press ‘a’).
Step 10: For unwrapping your selection, use UV then Unwrap or keep the mouse on the 3D view and hit (u and Unwrap). You will find other unwrapping options as well.
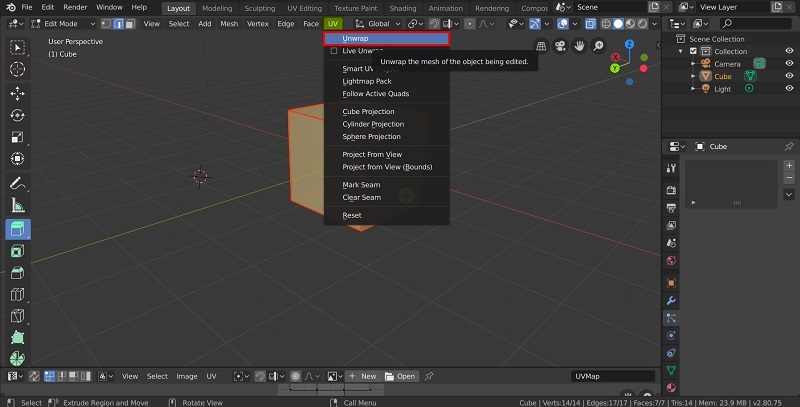
Finally, the cube is unwrapped. It is even more clear now about the purpose of marking the seams.
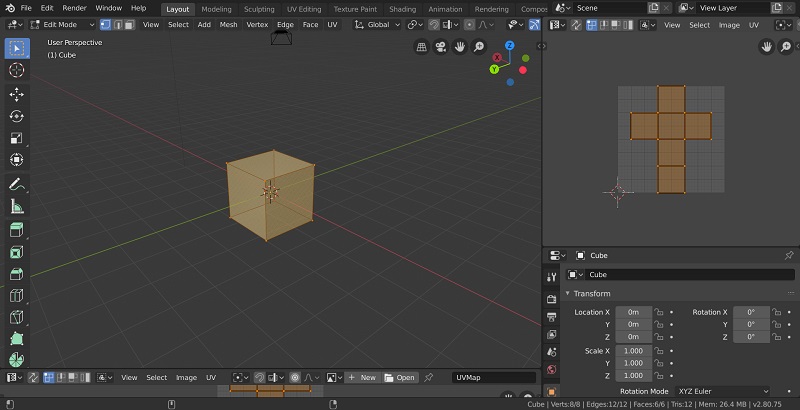
Step 11: Now, what we have with us is the raw UV data. It will be really useful to have some reference while working. For that let us start adding texture. Before that, you will need to change the 3D view for rendering the textured objects.
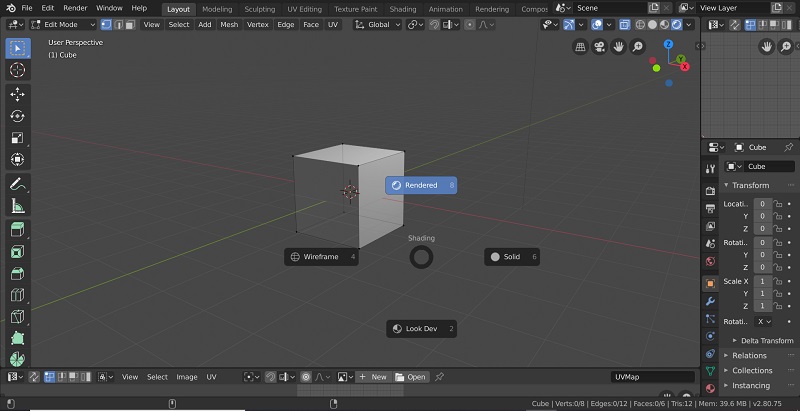
Note: There are four viewport shading modes which are located next to the X-ray mode. You can also access them by hitting the ‘Z’ key, which displays these modes in a pie menu as shown in the image. The 1st mode that is shown is wireframe. It displays the mesh in wire form. 2nd is the solid mode, which can be used to show the mesh without any texture or material in solid form. If you need to change the color, bg, or lighting, you can do it by varying the shading properties. The 3rd mode is LookDev that allows textures, materials, and colors to be visible. And finally, the 4th one is the rendered mode. It is like a preview to show how your scene will be formed once you render it.
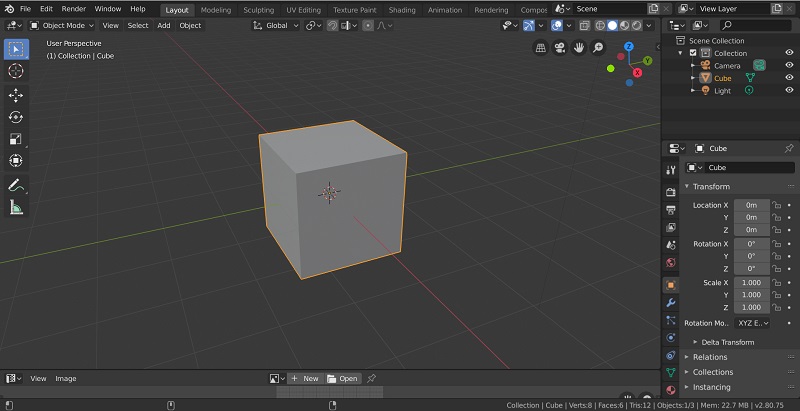
Step 12: Now, the mesh is drawn in 3D as pure white as it doesn’t have any texture. Therefore, we will create one. From the UV/Image editor view, choose Image then New Image.
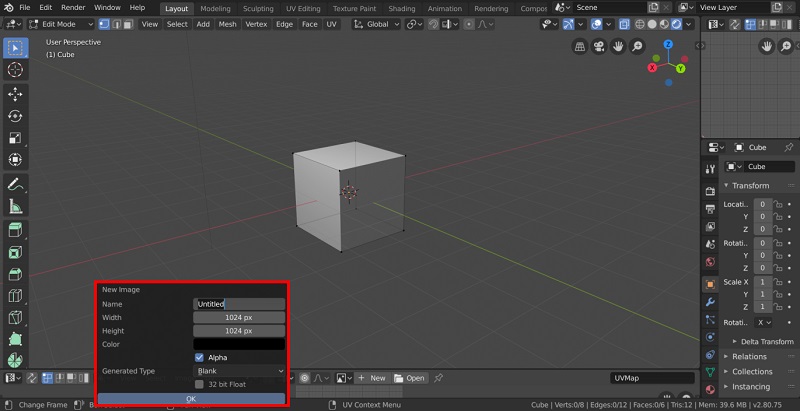
Step 13: Let the default setting be retained for now. The only change will be to check the ‘UV Test Grid’ for users of the previous version of Blender. This makes the texture into a checker pattern. This is helpful later for editing the UV data. You can look at the 3D view and check for changes in the checker like whether you are distorting the pixels by unwanted squeezing or stretching of the mesh. You can also know if the texture is distributed uniformly around the mesh.
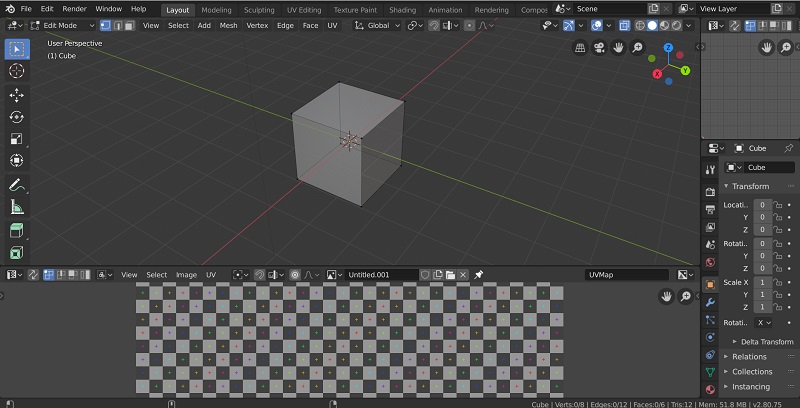
Now you have the final unwrapped mesh along with a reference texture. Now users can start editing the UV data in the editor similar to how you edit a mesh in a 3D view. It is clear that the unwrap process can get complex, the further you move away from the boxes. Though, the principle remains identical. You cut open a 3D mesh and flatten it into pieces with careful warping.
Note: Eevee is the default render engine in Blender 2.8. However, you can also choose Cycles.
Conclusion
While working in Blender, you might need to add texture to your object using the unwrap method. The UV unwrap tool is used to unwrap the faces of the object. It can be used to provide how the mesh fits best within an image. It is based on the faces that are connected within the seams. Each face attributes to a unique area in the image without overlapping other faces.
Source: educba.com